Baking

Mt. Hood Macaroons

It’s an impressive sight to view Mt. Hood from sea level when it emerges from behind the clouds in all its glory.

Yet, when I was living in Oregon, a fond memory was viewing Mt. Hood from a plane on a clear, moonlit night while on a westward descent into Portland International Airport.  There was something magical about seeing this volcanic peak, under these perfect conditions, totally bathed in moonlight as we went soaring by at eye level.

When I was looking for a cookie recipe a number of years ago on allrecipes.com I had this image of this snowcapped volcanic sentinel in mind. Not the popular smooth French-style macaron that come in a gorgeous rainbow of colors, but the wonderfully traditional American coconut macaroon version.

Here’s my modified macaroon recipe, with a Northwest “volcanic” twist. 😊

Portland Oregon skyline with Mt. Hood in the background. Wikipedia Photos

Ingredients

  • 3 egg whites, separated and at room temperature
  • 14 ounces organic and unsweetened flaked coconut
  • 1 teaspoon of vanilla extract
  • 8 oz. of your favorite dipping chocolate
  • 1 teaspoon vegetable oil (optional)

Directions

  1. Preheat oven to 375 degrees F (190 degrees C). Lightly grease a baking sheet or use parchment paper.
  1. Beat together the egg whites in a small bowl until it forms soft peaks- no pun intended!
  1. Add the sugar, about 1 tablespoon at a time, while continuing to beat until stiff peaks form. Continue to beat until glossy.
  1. Add the salt and vanilla extract to the coconut and mix well.
  1. Fold the coconut into the meringue.
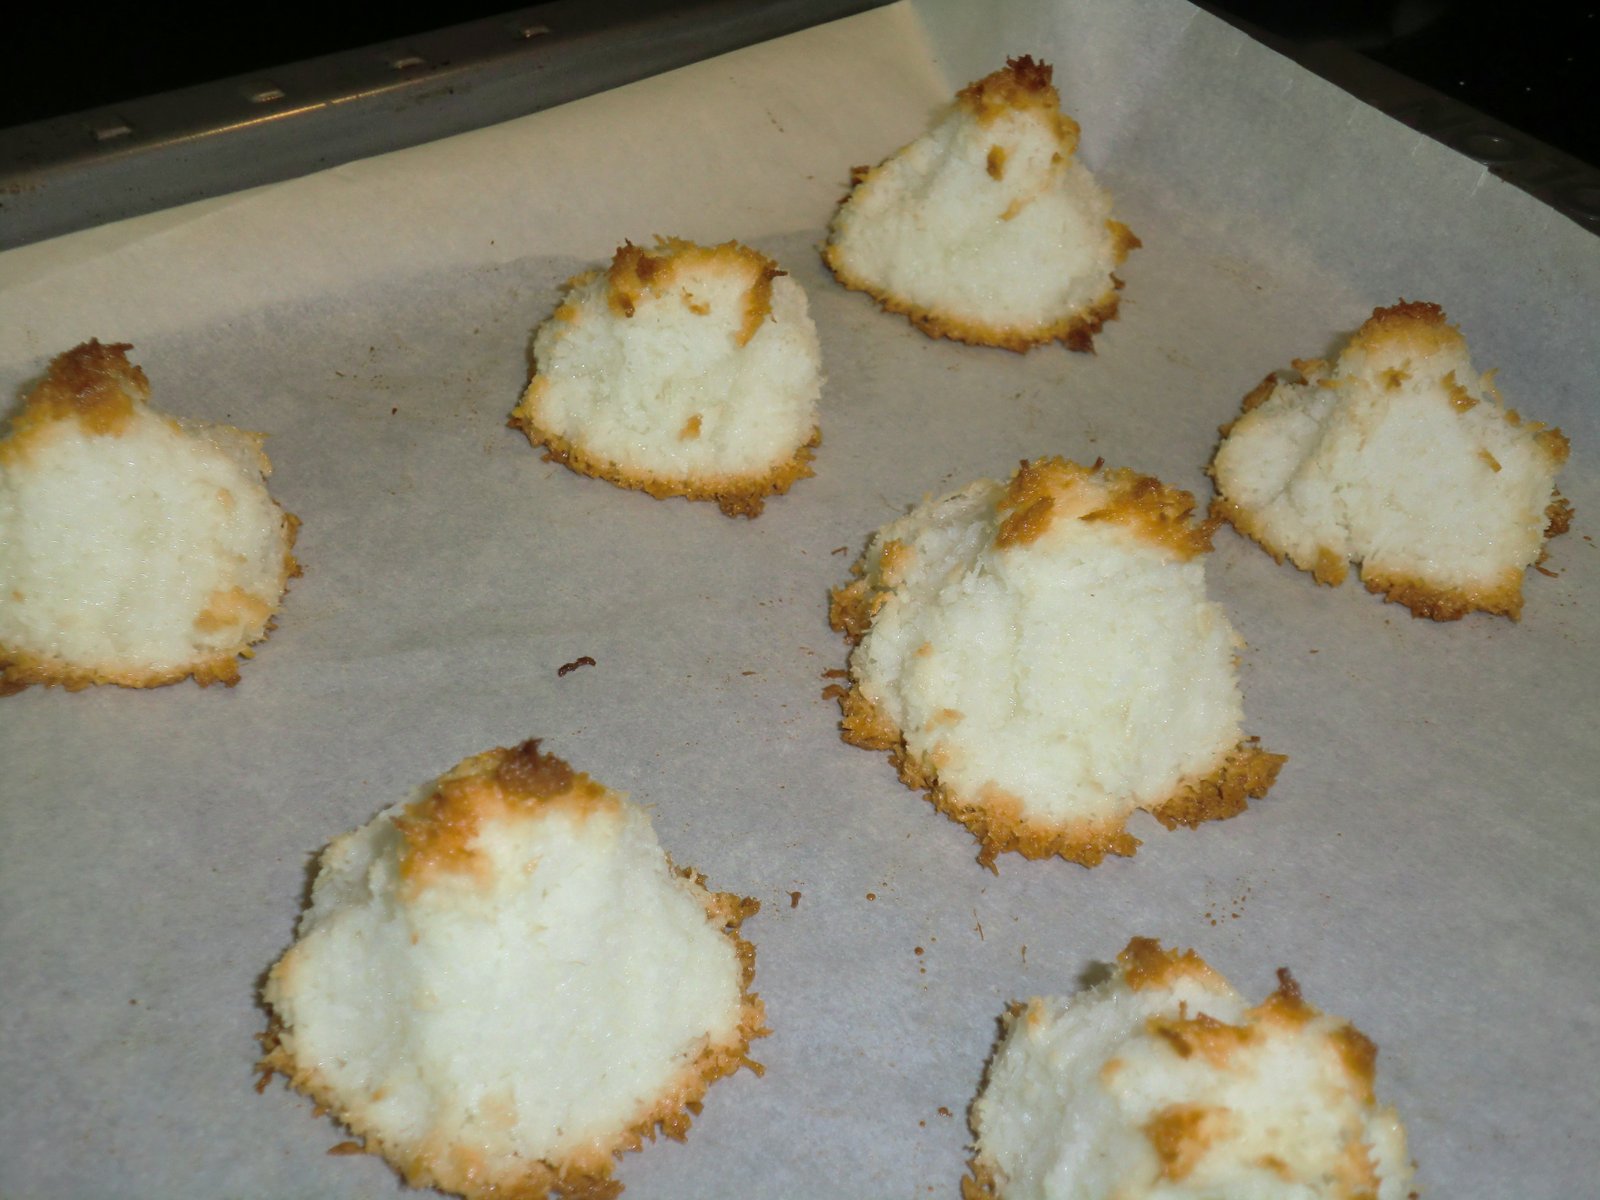
  1. Drop mixture by the teaspoonful onto the prepared sheet, spacing about 2 inches apart. Pinche the top of the mounds to shape them into a volcanic peak.
  1. Bake in the preheated oven for about 12 minutes.

Now comes the fun part. While the cookies are baking, melt your chocolate of choice in the microwave in 10-15 second increments. Be sure to stir between each heating until the chocolate is velvety smooth.

I chose to use E. Guittard’s L’Etoile du Nord” 64% Blended Dark Chocolate Wafers. I absolutely love the taste of Guittard’s “North Star,” which was apparent as I ate about as many wafers (discs) as I melted for the recipe! This chocolate is not too sweet, yet has warm, rich chocolate and spice notes which lend itself beautifully to baked desserts and confections. Here’s my favorite place to purchase chocolate online.

Guittard.com

Dip each cookie, after they have completely cooled, into the melted chocolate while holding the tip of the “peak”. BE sure to get a firm grip. True, there may be a few “casualties” until you get the hang of it. Yet I believe the crunchy chocolate covered edges of “mountain base” makes this technique well worth the extra effort.

My first batch was dipped in pure melted chocolate. In the second batch I added one to two teaspoon of canola oil to make it the melted chocolate less viscous. The latter batch revealed the “terrain” of the slopes better and the individual cookies were easier to lift off the dish after they cooled in the fridge.

Maybe this will inspire you to create some of these macaroon mountain morsels for yourself. Or at least go out and buy some already made ready to be dipped into the chocolate of your choosing. Either way, have a “peak” experience and enjoy your choco-creations!

Mt. Hood Macaroons Read More »

What Are Your Earliest Chocolate Memories?

This question often sparks an engaging conversation among chocolate tasting program participants.

For me, it brings me back to our kitchen in our second floor flat in San Francisco’s North Beach and visions of my paternal Nana (my namesake) making a Sicilian specialty called Totos di Cioccolata. (The pronunciation of these treats isn’t like Dorothy’s little dog, but with the accent on the second syllable).  

My Nana, Savina “Carmelina” Fazio, was well-known for her cookies.

This spicy, iced cookie version not only has cocoa powder in it, but chunks of dark chocolate as well. I fondly recall eating them while they were still warm. Yet after they are cooled and iced, these are still heavenly. Roughly ten years ago, I called my Aunt Melina and Mama Maria and they shared this family recipe with me. As you might imagine, they both had slightly different variations on my grandmother’s recipe.  Big Savina (as opposed to me, Little Savina) never measured or wrote anything down- always cooking and baking “more or less by heart.”

Here are the ingredients you’ll need:

Cookies: 3 cups sifted flour (My family has always used Gold Medal), 1/2 cup chopped walnuts,  1/2 cup tiny raisins,  3 tsp baking powder, 3 tb Crisco, 1 cup sugar,  1 tsp allspice, 1 1/2 tsp cinnamon, 1/4 tsp cloves, ¼ tsp nutmeg, 1 12 oz package Nestle’s mini semi-sweet morsels, 1 cup Ghirardelli unsweetened cocoa powder (Nana would have to have this brand or she wouldn’t make them.  Not sure if it was because of the quality or the fact that Domingo was Italian!), 1 big orange for the grated zest and juice, regular milk.

Icing:  Powdered sugar,  regular milk  and lemon juice.

Putting It All Together:  Mix the flour and Crisco with your hands until the shortening is in very fine pieces. Then put in all the additional ingredients.

Carefully mix everything together (“Easy, easy,” as my Aunt emphasized). Slowly add the milk, a little at a time. Work it with your hands and be careful not to make the mixture too wet.  Let it stand for an hour.

Take about a tablespoon of the mixture and roll into a ball. Arrange them on a greased cookie sheet- they don’t expand much during baking, so can be fairly close together. Bake at 350 for about 10 minutes. Be sure to watch the bottoms to avoid burning. Let the cookies cool completely.

For the glaze, mix powder sugar and milk with a fork. To make the icing shiny and add extra flavor, sprinkle in a tablespoon of lemon juice. Try to make it not too watery and not too thick. You’ll know the right consistency by sight and feel (Think Elmer’s glue). After the cookies have cooled completely, apply the glaze with your finger tips to the top and sides of the cookie. Let them dry overnight. (If you are especially motivated, you could then apply glaze to the bottoms).  Scrape excess icing from the bottom edges with a knife if you find that necessary.

Found a recipe that was similar to this one on the web, only they called them Chocolate Italian Wedding Cookies. I always thought wedding cookies were those powdered sugar-covered shortbread cookies from Mexico, Greece or Russia that just melt in your mouth. Who knows, maybe Italians were more realistic by adding those walnuts and chocolate chunks to symbolize the “rough and bittersweet spots” we encounter along the road of life!

Making these cookies can be tedious, but well worth it. Let me know if you ever try them.

Happy chocolate reminiscing. We’d love to hear about your earliest or favorite chocolate memories in the comments below.

Buon Appetito!

What Are Your Earliest Chocolate Memories? Read More »